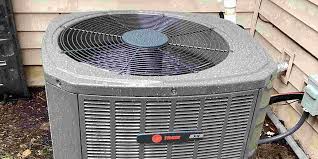
By forcing air through the evaporator coil, the fan motor in your air conditioning (AC) unit is essential to making sure the system cools effectively. Fan motors may eventually wear out or malfunction, which could cause the AC unit to shut off entirely, make odd noises, or provide insufficient cooling. Conducting a continuity test is among the most efficient methods to determine whether the AC fan motor is defective. This test determines whether the internal winding circuits of the motor are functional or damaged. https://www.socool.sg/fan-motor-replacement/ can perform the test for you and find out any possible issues. This is an easy-to-follow guide on utilizing a continuity test to examine an AC fan motor.
Safety First: Disconnect The Electricity
Safety should always come first when working on your air conditioning unit. Verify that your air conditioner’s power source is fully off. Find your home’s circuit breaker panel and turn the AC unit’s control switch to the “Off” position. Try to unplug the AC unit or turn off the electricity at the shutoff switch for further safety. If you don’t have the knowledge for doing it correctly, hire https://www.socool.sg/ as they have the expertise as well as equipment.
Get to the Fan Motor:
Access the AC fan motor after turning off the electricity. Typically, this entails taking off the outside unit’s top cover or panel (the condenser). The screws holding the lid in place might need to be taken out with a screwdriver.
The fan blades are linked to the motor and visible when the lid is removed. Look over the motor for any obvious damage, like burned wires, rust, or worn bearings, and take some time to inspect it. A noticeable physical deterioration is a good sign that the motor may need to be replaced.
Find The Terminals For The Fans:
You must locate the electrical terminals of the fan motor in order to test for continuity. These are where the power supply cables are linked, and they are often found on the motor’s side. There are three possible labels for the terminals: C stands for common, S for start, and R for run. The purpose of measuring continuity at these terminals is to ascertain whether the motor is still in good operating order.
Select Continuity Mode On The Multimeter:
It’s time to get your multimeter ready now that the fan motor is visible and you can reach the terminals. A sound wave or diode indication on the multimeter usually indicates the continuity testing mode. Set it to that mode. The multimeter will make a continuity-indicating sound when the probes are touched together. In the event that your multimeter lacks a continuity mode, you may still utilize the resistance (ohms) setting. In this instance, continuity is shown by a low resistance measurement; absence of continuity is indicated by a “infinity” or extremely high reading.
Verify the Motor Windings’ Continuity
Follow these methods to test the motor windings’ continuity using the multimeter probes:
- One probe should be placed on the C (common) terminal and the other on the S (start) terminal to test the connection between Common and Start. The multimeter indicates continuity between these terminals if it beeps or displays a low resistance value.
- One probe should now be placed on the C (common) terminal and the other on the R (run) terminal to test the connection between Common and Run. If continuity exists, the multimeter should either indicate it with a beep or provide a low resistance value.
- Finally, position the probes on the S (start) and R (run) terminals to test the relationship between Start and Run. Between these two endpoints, there need to be continuity as well.
The fan motor will need to be replaced if any of these tests reveal no continuity, which is shown by an infinite resistance measurement or no beeping. This indicates that the winding between those terminals is damaged.
Put The Unit Back Together:
After the continuity test is over, put the AC unit back together by fastening the fan motor cover and any additional panels you took out. Verify that all wire connections are secure and that all screws are tight.


